Raised Bed Gardening for Beginners: How to Start
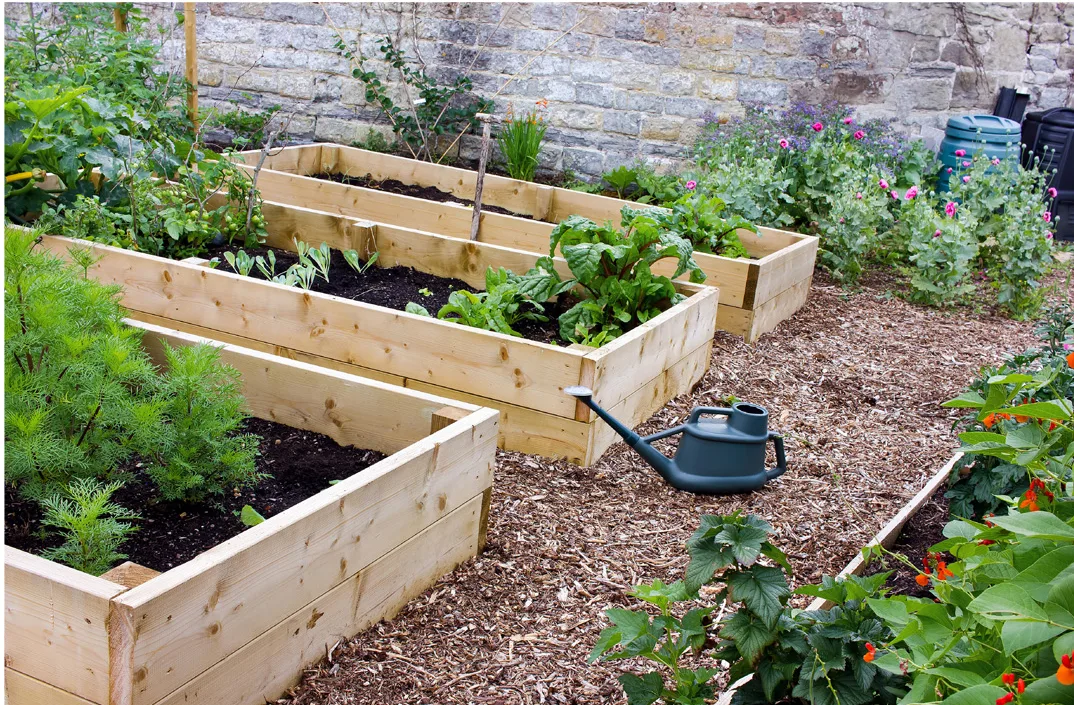
Raised bed gardening for beginners starts with one honest truth: most first-timers fail in the planning stage, not the planting stage. They build the box before they track the sun. They fill it with native soil and wonder why nothing thrives.
The fix is simple. Pick the right spot, match the bed to your space, and the rest falls into place.
Get those first decisions wrong and you’ll spend your season fighting the bed instead of enjoying it. Get them right and you’re harvesting salad in eight weeks. Per the USDA’s plant hardiness data, knowing your zone and frost dates is the baseline.
Here’s how to start a raised bed that actually works from day one.
Raised Bed Gardening for Beginners: How to Start
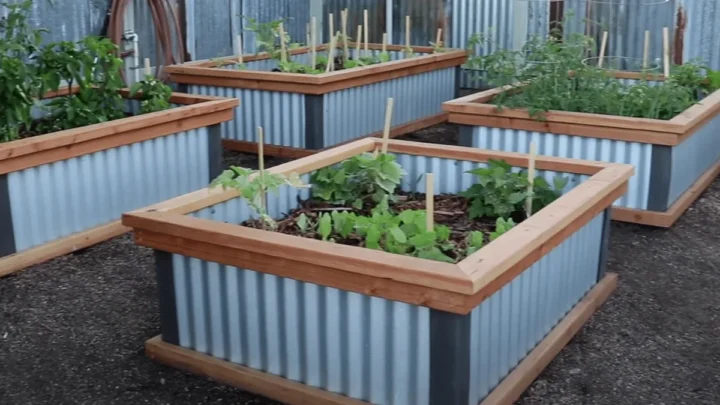
Start with a 4×8 foot, 12-inch-deep bottomless bed in full sun. Wood or galvanized steel both work. Fill it with a blended mix of compost, topsoil, and aeration material like coarse sand or coconut coir.
Site it where it gets 6 to 8 hours of direct light. Build, fill, and plant in a single weekend.
Start Here: The One Thing That Decides If Your Raised Bed Works
Placement. That’s the one decision that overrides every material, size, and soil choice you’ll make. A beautiful bed in the wrong spot fails.
A cheap bed in the right spot feeds you for months.
So walk your yard before you spend a dollar. Track where the sun hits from morning to late afternoon. Do it for a full day, ideally on a clear one.
Most vegetables want 6 to 8 hours of direct sun. Salad greens, herbs, and root crops can manage with 4 to 6. If your only open spot gets 3 hours, you’re better off with lettuce than tomatoes.
Why placement beats every other choice you’ll make
Sun drives photosynthesis. No workaround exists. A drip line can fix dry soil.
A row cover can fix a cold snap. Nothing fixes shade.
Water access matters just as much. You’ll water roughly 1 inch per week, often more in peak summer. A bed within reach of a hose bib saves you hauling cans all season.
Slope and drainage come next. Raised beds drain better than ground soil by design. But a bed sitting in a low spot that holds water will still rot roots after heavy rain.
The 3 conditions that change every recommendation that follows
Here’s the decision logic, laid out plain.
- If you have full sun and ground access, you can build a standard 4×8 in-ground-contact bed.
- If you have full sun but no diggable ground, you need a bottomless bed over concrete or a tabletop planter.
- If you have partial sun, shift your crop list toward greens, herbs, and root veg instead of fruiting crops.
Two other variables matter. Your frost dates set what you can plant and when. Your budget sets how big you can go.
Both are easy to pin down before you start.
Quick answer if you’re short on time
Build a 4×8 foot bed, 12 inches deep. Site it in full sun. Line the bottom with cardboard or hardware cloth.
Fill with a compost-heavy blend. Plant. That’s the short version.
The longer version, which we’re walking through now, is about matching each of those choices to your actual situation.
Pick Your Situation: Which Raised Bed Setup Fits You
A raised bed is a bottomless or contained planting box filled with a controlled soil mix. It sits on top of your existing ground rather than in it. That single feature solves most of the problems beginners run into.
So which setup fits you? Answer three questions. Where will it sit?
How big can it be? What’s it made of? Each answer narrows your options.
Don’t overthink the first bed. Beginners who go small and simple almost always stick with it. Beginners who overbuild often stall before planting.
Yard vs. patio vs. balcony: matching the build to your space
Your surface decides the bed type. Match it, and you avoid the most common setup mistake.
- In a yard over soil: bottomless bed. Roots reach down for moisture. Cheapest and best-performing option.
- On a patio or driveway: bottomless bed with a base, or a wicking bed that holds water in a reservoir.
- On a balcony: tabletop or elevated planter. Keep it light for load limits.
- Rooftop: weighted, low-profile beds. Check building rules before you build.
If you’re over concrete, drainage is automatic, but water loss speeds up. Add a wicking reservoir or plan on more frequent watering.
4×4, 4×8, or a kit, sizing your first bed
The classic beginner bed is 4×8 feet. The rule behind it is reach. You should never walk on your soil, so 4 feet wide is the max for reaching the middle from both sides.
A 4×4 is a great first bed for a small space or a single crop group. A 4×8 gives you room for a real mix of vegetables. A 2×8 fits narrow side yards.
Length is flexible. Width caps at 4 feet. Depth is a separate call, covered in the next section.
Wood, galvanized steel, or composite, an honest material breakdown
Frame material affects cost, lifespan, and appearance. Here’s how the main options stack up against each other.
| Material | Typical Lifespan | Cost Level | Notes |
|---|---|---|---|
| Untreated cedar | 10 to 15 years | Moderate | Naturally rot-resistant, food-safe |
| Untreated pine or fir | 3 to 5 years | Low | Budget option, will need replacing |
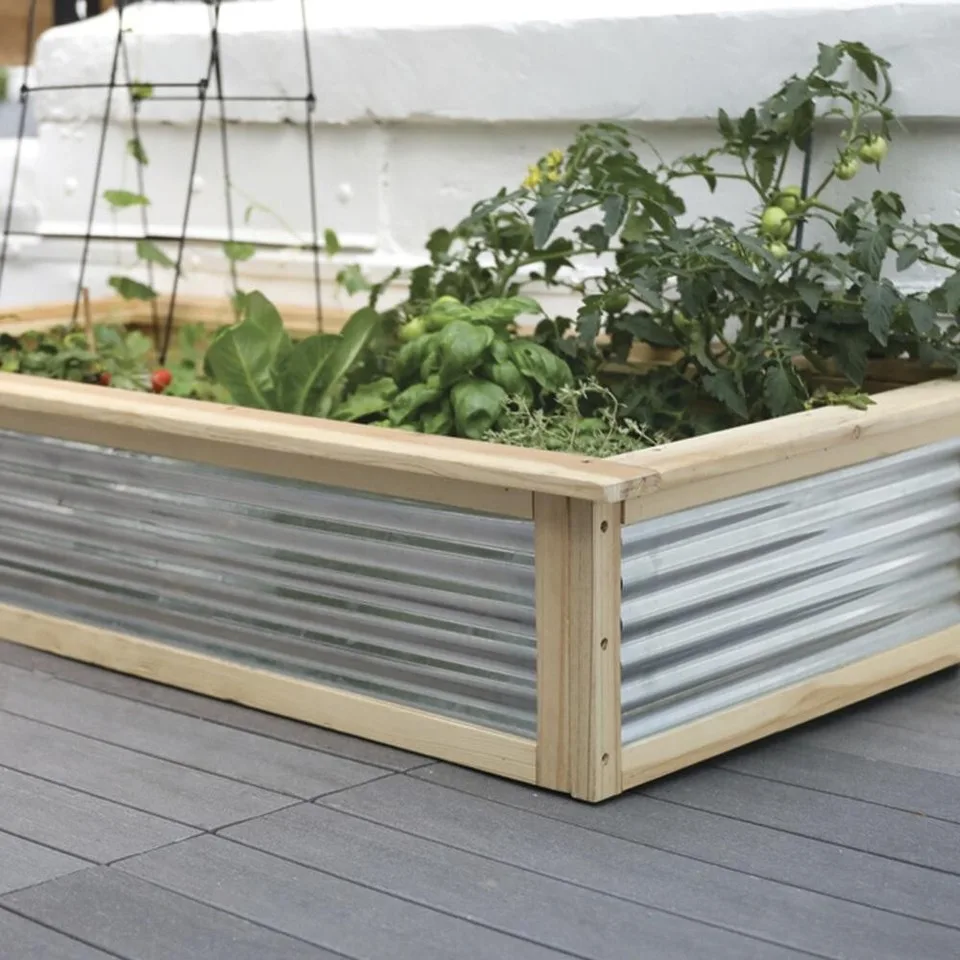
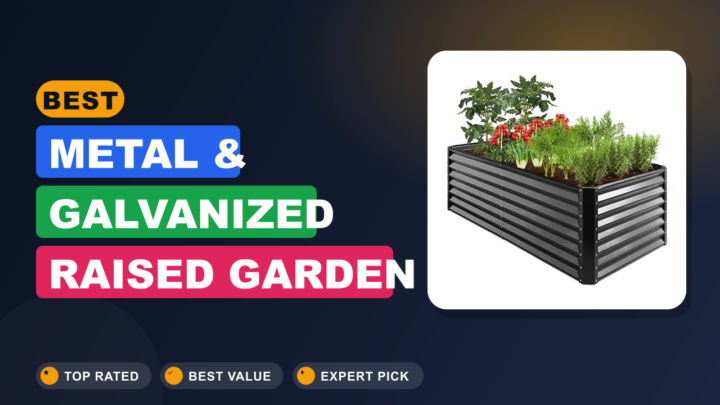
| Galvanized steel | 15 to 20 years | Moderate to high | Durable, heats soil in sun |
| Composite | 15 to 20+ years | High | Rot-proof, heavier upfront cost |
| Pressure-treated (ACQ/MCA) | 10 to 15 years | Low to moderate | Modern treatments considered safer than old CCA |
Old pressure-treated wood from before 2004 used chromated copper arsenate, which the EPA phased out for residential use. Modern ACQ and MCA treatments are the current standard. If you inherit an older bed, replacing it is the safe call.
Avoid creosote-treated railroad ties and unknown salvaged pallet wood. You don’t know what soaked into them.
DIY vs. kit: when each one actually makes sense
Build it yourself if you have basic tools and want to save money. A 4×8 cedar frame runs roughly $120 to $250 in lumber in the US, as of 2026.
Buy a kit if you want speed and a clean look. Galvanized steel kits run $80 to $250 and assemble in under an hour. They also last longer than most untreated wood.
There’s no wrong answer. The kit crowd gets to planting faster. The DIY crowd gets a custom fit and often a lower price.
Depth, Soil, and Sun: The Numbers That Matter
Depth and soil volume are where beginners either waste money or shortchange their crops. Get the numbers right and you save both cash and frustration. The USDA Natural Resources Conservation Service publishes soil health guidance that backs the compost-heavy approach we use here.
So how deep does your bed need to be? It depends entirely on what you’re growing. Shallow crops need less.
Root crops need more.
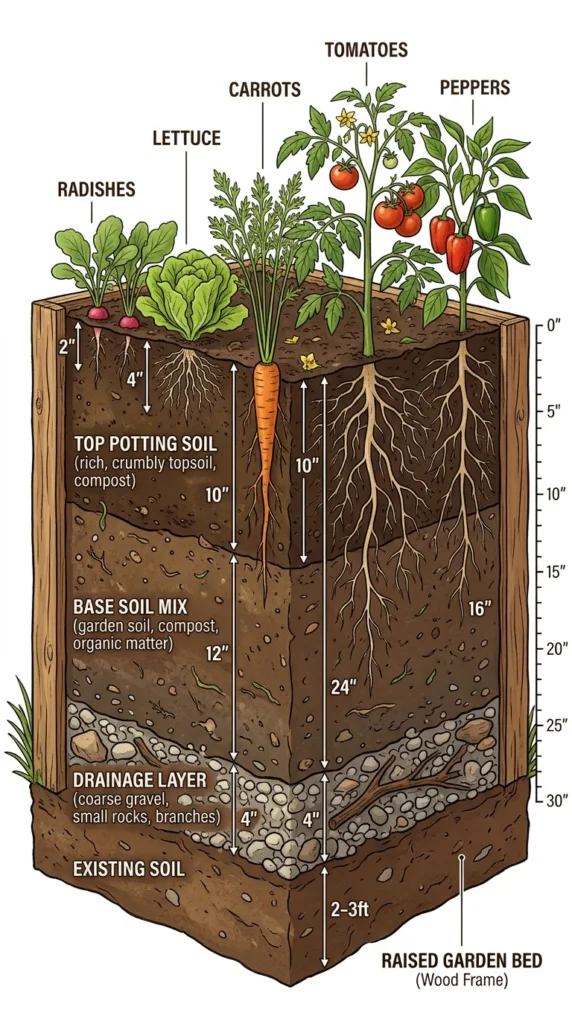
How deep for what you’re growing
Use this as your depth guide, matched to crop type.
| Crop Group | Minimum Depth | Examples |
|---|---|---|
| Leafy greens and herbs | 6 inches | Lettuce, spinach, basil, chives |
| Most vegetables | 8 to 10 inches | Tomatoes, peppers, beans, squash |
| Root crops | 12 inches or more | Carrots, parsnips, beets |
| Potatoes | 18 inches or more | Or use a dedicated potato bag |
If you want one depth for everything, go 12 inches. It covers almost every common crop and gives roots real room. Deeper beds also hold moisture better through summer.
Don’t chase depth you don’t need. A 6-inch bed filled with the right mix grows better greens than an 18-inch bed filled with the wrong one.
Calculating soil volume so you don’t overbuy
Soil volume is the number that trips people up most. The formula is simple. Multiply length by width by depth in feet.
That gives you cubic feet.
- 4×4 bed at 1 foot deep = 16 cubic feet
- 4×8 bed at 1 foot deep = 32 cubic feet
- 4×8 bed at 6 inches deep = 16 cubic feet
Bagged soil usually comes in 1.5 or 2 cubic foot bags. A 4×8 bed at 12 inches deep needs roughly 16 to 21 bags. Bulk delivery is sold by the cubic yard, and one yard equals 27 cubic feet.
Expect your soil to settle several inches in the first season. Plant that reality into your plan. You’ll top it up next year.
Bagged mix vs. bulk delivery vs. homemade blend
Bagged mix is convenient and consistent. It’s also the most expensive per cubic foot. Bulk delivery wins on price once you pass about 20 cubic feet, but you need a place to dump it.
The homemade route is cheapest if you already compost. The common recipe is roughly one-third compost, one-third topsoil, and one-third aeration material like coarse sand, perlite, or coconut coir.
Skip native garden soil as your main fill. It compacts in a raised bed, drains poorly, and often hides weed seeds. A little is fine.
Making it the whole bed is a mistake.
Tracking sun before you build, not after
Track the sun on your chosen spot before you build anything. Watch it across a full day. Note where shadows fall and when.
A spot that looks sunny at noon might sit in shade by 3 p.m. That’s a tomato killer. Six hours of direct sun is the minimum for fruiting crops.
Eight is better.
You want to read what the map shows at a glance: which corner gets morning light, where the afternoon shade settles, and where your crops will actually thrive.
How to Build and Fill Your First Bed, Step by Step
This is the hands-on part. Follow these steps in order and you’ll have a planted bed in a single weekend. Tool list first, then the build.
You’ll need a saw, a drill, galvanized screws, hardware cloth or cardboard for the base, and a wheelbarrow for soil. That’s it for a basic frame.
Siting, marking, and calling 811 before you dig
Call 811 before you dig anywhere. That’s the national Call Before You Dig service in the US. It’s free and it marks buried utilities.
Hitting a gas or power line is a serious, avoidable risk.
Once utilities are marked, set your footprint with stakes and string. Level the ground under the frame. A bed on uneven ground twists and can crack over time.
Position the bed so you can reach the middle from both long sides. That 4-foot width rule keeps you off the soil.
Cutting, assembling, and lining the frame
Cut your lumber to length. Pre-drill the ends to stop the wood from splitting. Screw the corners with galvanized hardware so the fasteners don’t rust out.
For a 4×8 bed, use twelve-inch-wide boards if you want that full root-crop depth. Stack and screw a second course for extra height.
Line the bottom based on your pest situation. Cardboard smothers weeds and breaks down over the season. Hardware cloth blocks gophers, voles, and moles.
If burrowers are a problem where you live, hardware cloth is the safer choice.
Filling, settling, and amending the soil
Fill the bed with your blended mix. Add it in layers, watering between them to help everything settle. Don’t pack it down hard.
You want loose, airy soil.
Expect settling of several inches in the first season. Plan on topping it up with compost each spring.
Mix in a slow-release organic fertilizer at planting time. A little goes a long way. Too much nitrogen grows leaves instead of fruit.
Planting: direct sow vs. transplants, and spacing per square foot
Some crops go straight in as seed. Others do better as transplants you’ve started indoors.
- Direct sow: carrots, radishes, beans, lettuce, spinach, and most root crops.
- Transplant: tomatoes, peppers, eggplant, and anything you started indoors.
Follow square-foot spacing to avoid crowding. Tomatoes get one per square foot. Lettuce gets four.
Carrots get sixteen. Crowded plants compete for light and never fill out.
Water everything in well after planting. Then mulch the surface to hold moisture and block weeds.
Watering, Feeding, and Keeping It Alive Through Summer
A planted bed is the easy part. Keeping it alive through July is where beginners get tested. Raised beds dry out faster than ground soil, so watering is the number one job.
Per USDA NRCS guidance, consistent moisture is central to healthy soil life and root development.
Follow these habits and your bed sails through the hot months.
Drip, soaker hose, or hand watering, what actually works
Hand watering works for a small bed if you’re consistent. It’s also the easiest to get wrong because you can’t tell how deep the water reached.
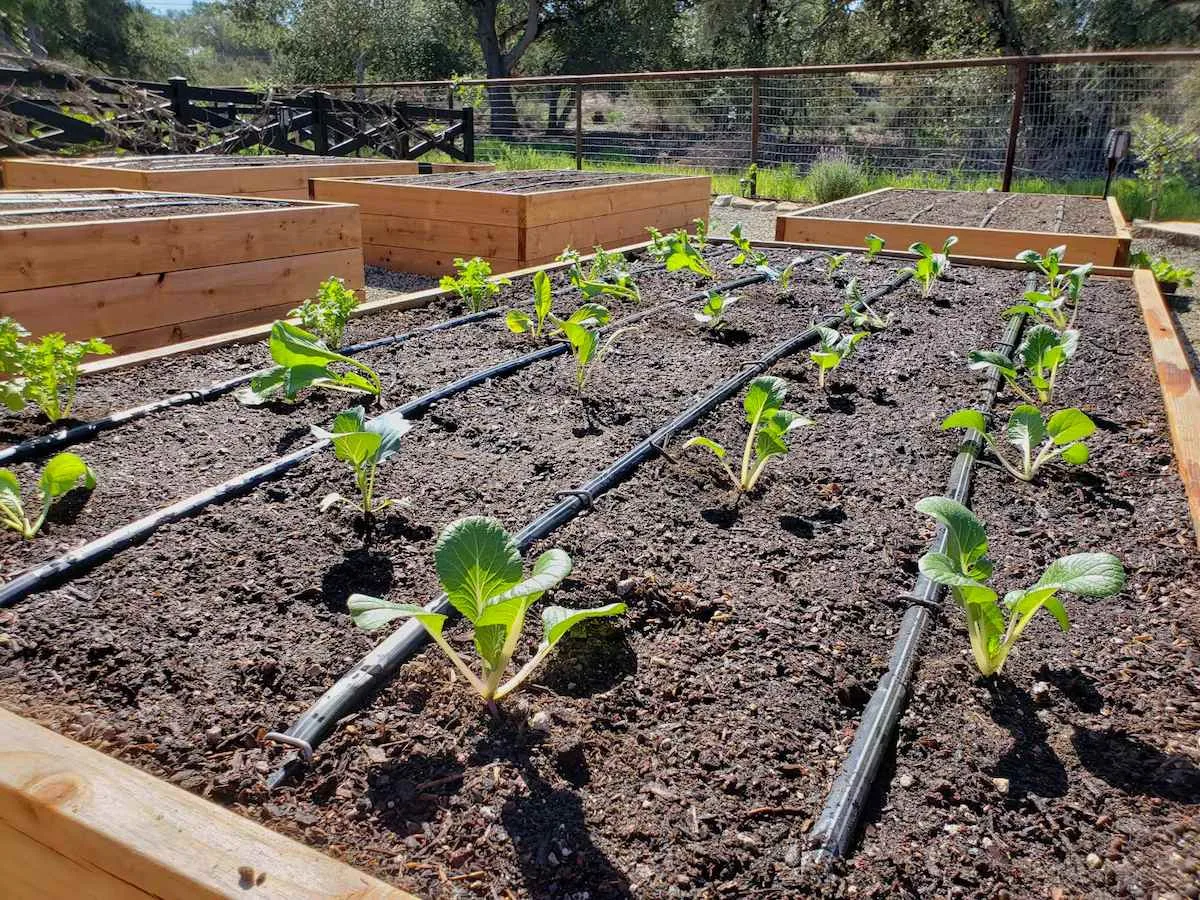
Drip irrigation and soaker hoses deliver water slowly at the root zone. Less evaporation, fewer leaf diseases, and better consistency. They cost a bit upfront and save time all season.
Aim for about 1 inch of water per week, more in the heat. Water deeply and less often. Shallow daily sprinkling grows weak roots.
Mulch and why raised beds dry out faster
Raised beds dry faster because they’re exposed to air on all sides. That’s a feature in wet climates and a challenge in dry ones.
Mulch is the fix. A 2 to 3-inch layer of straw, shredded leaves, or wood chips cuts evaporation dramatically. It also suppresses weeds and keeps soil temperature steadier.
Reapply mulch through the season as it breaks down. Organic mulch feeds the soil as it decomposes.
Feeding through the season without overdoing it
Feed lightly and regularly rather than all at once. A slow-release organic fertilizer at planting often covers the first stretch.
Mid-season, side-dress heavy feeders like tomatoes and peppers with compost or a diluted organic feed. Compost tea and fish emulsion are popular, gentle options.
Watch for yellowing lower leaves. That usually signals a nitrogen shortfall. Too much feeding shows as lush leaves and little fruit.
Pest control and season extenders
Scout for pests weekly. Catching them early is far easier than fighting an infestation.
Row covers block many flying pests and double as frost protection. Hoop houses and cold frames add 4 to 8 weeks to your growing season, one on each end. Spun fabric row cover keeps light and air moving while it blocks bugs.
Encourage beneficial insects by planting flowers nearby. Marigolds and nasturtiums are beginner-friendly companions that pull their weight.
What It Costs: Real Numbers Before You Commit
Budget surprises sink first gardens more often than bad soil does. Aggregate pricing data for the US market, as of 2026, puts a realistic first-year range between roughly $200 and $600 depending on size and material. Knowing the breakdown before you shop keeps the project on track.
Here’s where the money actually goes for a standard 4×8 bed.
| Line Item | Low End | High End |
|---|---|---|
| Frame (DIY lumber) | $120 | $250 |
| Frame (galvanized kit) | $80 | $250 |
| Soil mix (32 cu ft) | $130 (bagged) | $80 (bulk) |
| Hardware cloth or cardboard | $10 | $35 |
| Drip irrigation or soaker hose | $25 | $70 |
| Seeds and transplants | $20 | $60 |
| Fertilizer and mulch | $15 | $40 |
Bulk soil flips the math in your favor once you’re filling past 20 cubic feet. Bagged mix wins only for small beds or partial top-ups.
Where beginners overspend and where it’s worth it
Beginners overspend on oversized beds and underspend on soil quality. A 4×12 bed costs more to fill and takes longer to manage than most first-timers can handle.
Spend your money on the fill, not the frame. Cheap lumber with great soil beats premium cedar with poor fill every single time.
The one upgrade worth paying for early is hardware cloth, if burrowers are a problem in your area. Replacing gopher-eaten roots costs a whole season.
Mistakes That Kill a First Raised Bed (And How to Skip Them)
Most first-bed failures trace back to four avoidable calls. Recognize them now and you skip a season of frustration. We’ve watched these patterns repeat across thousands of beginner accounts.
Building before tracking sun
Building before tracking sun is the top mistake. A bed dropped into a spot that looks bright at breakfast can sit in afternoon shade by summer.
If a spot only gets partial sun, shift your crop list to greens and herbs. Don’t force tomatoes into a spot that can’t support them.
Filling with native soil
Native garden soil compacts hard in a raised bed. It drains poorly, hides weed seeds, and holds roots back.
If your soil is heavy clay, it turns into brick once it dries in a contained bed. Use a blended mix instead, with compost and aeration material doing the heavy lifting.
Ignoring drainage, gophers, and old treated wood
Skip these three checks and you’ll pay for them later.
- Drainage: a bed in a low, wet spot rots roots after heavy rain. Raise it or redirect water.
- Gophers: unchecked, they strip a bed’s roots underground. Hardware cloth stops them cold.
- Old treated wood: pre-2004 CCA lumber carries arsenic the EPA phased out. Replace it.
Crowding plants and skipping mulch
Crowded plants compete for light, water, and nutrients. They also trap humid air that invites disease. Follow square-foot spacing even when the bed looks empty.
Skipping mulch is the quiet killer. Bare raised-bed soil dries fast and bakes in summer heat. A 2 to 3-inch mulch layer fixes both problems for a few dollars.
Raised Beds vs. In-Ground vs. Containers: Which Is Right for You
The best bed depends on your space, your soil, and how much you want to manage. Here’s how the three main options compare directly.
| Factor | Raised Bed | In-Ground | Container |
|---|---|---|---|
| Soil control | Full | None | Full |
| Setup cost | Moderate | Lowest | Low |
| Weeding effort | Low | High | Low |
| Drainage | Excellent | Depends on soil | Excellent |
| Bending needed | Reduced | Yes | Reduced |
| Best for renters | Yes | No | Yes |
Side-by-side comparison by space, cost, effort, and results
Raised beds win on soil control and drainage. In-ground wins on cost and scale. Containers win on portability and small-space fit.
Raised beds hold heat earlier in spring, so you plant sooner. In-ground beds warm up slower but hold moisture longer once summer hits.
Containers dry out fastest of all three. If your bed is over concrete in a hot climate, expect to water more often.
Who should skip raised beds entirely
Skip raised beds if you have excellent native soil and a large plot. The investment doesn’t pay off when the ground is already good.
Skip them if your budget is tight and your space is temporary. Containers cost less and move with you.
Skip them if you can’t commit to weekly watering. A raised bed is a living system that needs attention through the season.
Maintaining and Reusing Your Bed Season After Season
A raised bed gets better with age if you maintain it. The soil improves. The frame settles.
Your job is to top it up and keep it working.
Topping up settled soil
Soil settles several inches over the first season. That’s normal and expected after the initial fill.
Top up with compost each spring before planting. Blend it into the top few inches so it mixes with the existing soil.
Add a slow-release organic fertilizer at the same time. It restores nutrients the previous crop pulled out.
Fall cleanup, cover crops, and winterizing the frame
Clear spent plants in fall rather than leaving them to rot. Diseased foliage belongs in the trash, not the compost pile.
Plant a cover crop like clover or winter rye to hold the soil through winter. It also feeds soil life when it dies back.
Top the bed with a fresh mulch layer before the cold sets in. Check the frame for loose screws and repair any splitting wood.
Rotating crops so the bed stays productive
Rotate crop families between seasons to break pest and disease cycles. Don’t plant tomatoes in the same spot year after year.
Move heavy feeders like tomatoes and peppers into spots where beans or peas grew last season. Legumes add nitrogen that the next crop uses.
Keep a simple rotation log. It takes two minutes and saves you real headaches later.
Beginner FAQs: Sun, Depth, Cost, and First Crops
How much sun does a raised bed really need?
Most vegetables need 6 to 8 hours of direct sun daily. Leafy greens like lettuce and spinach manage with 4 to 6 hours. Fruiting crops like tomatoes, peppers, and squash need the full 6 to 8 to set fruit.
What’s the cheapest way to fill a raised bed?
Blend your own mix from bulk compost, topsoil, and aeration material. Bulk delivery runs roughly $40 to $80 per cubic yard versus bagged soil at $8 to $15 per 1.5 to 2 cubic foot bag. Homemade compost cuts the cost further.
What should I plant first?
Start with lettuce, radishes, and herbs. They germinate fast, need less sun, and give you a confidence win within weeks. Add tomatoes, peppers, and beans once you’ve had one successful season.
Do I need to line the bottom?
Line the bottom with cardboard to smother weeds, or hardware cloth to block gophers, voles, and moles. Skip the liner if you’re building over clean, clear ground and have no burrowing pest pressure.
How long does setup take?
A basic 4×8 frame assembles in about an hour with a drill and pre-drilled lumber. Fill, settling, and planting add another few hours. Most beginners finish a working, planted bed in a single weekend.
Your First-Season Decision Guide
Here’s the whole thing in seven moves, condensed so you can act on it this weekend.
- Track the sun on your spot for one full day before anything else.
- Call 811 to mark buried utilities, then stake out your footprint.
- Choose a 4×8 foot bed at 12 inches deep, the size that covers almost every crop.
- Pick your frame material based on budget and lifespan, not looks.
- Line the bottom with cardboard for weeds or hardware cloth for burrowers.
- Fill with a blended mix of compost, topsoil, and aeration material, then let it settle.
- Plant by your frost dates and space crops to the square-foot rule.
Build the right bed for your situation, and everything after it gets easier. Build the wrong one and no amount of care rescues the season.
When to plant, based on your frost dates
Plant your cool-season crops two to four weeks before your last spring frost. Lettuce, spinach, radishes, peas, and carrots all tolerate cold soil.
Wait until two weeks after the last frost for warm-season crops like tomatoes, peppers, and squash. Cold soil stalls them and invites rot.
Check your first fall frost date for a second planting window. Fast crops like radishes and greens can fit another round before the cold returns.
Treat your first bed as a learning season. One good harvest builds more skill than a perfect plan you never plant.


[…] Raised beds aren’t a weekend novelty. You’re building soil infrastructure that will sit in your yard for a decade or longer. Get the material wrong and you’re rebuilding beds instead of growing food. […]